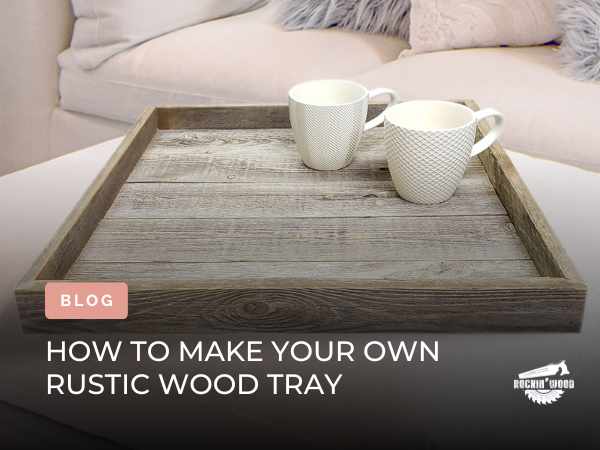
As you stay at home and maintain social distancing from others, you might feel like having breakfast, lunch, or dinner in bed while watching your favorite show on Netflix.
If you have children, you might want to relax in bed as a bonus after they sleep. Despite the time, there are chances that you want to enjoy your meal in bed on a serving tray.
However, with the current condition of finances in our country, buying a wooden tray can be a luxurious, yet expensive purchase. In addition, many stores, such as Rockin Wood, sell these types of trays at a reasonable price for your convenience. However, many stores selling these types of items are closed now, so you have limited options if you want to purchase one. However, you can make this serving tray at home with minimal effort and the materials you usually have at home. But before that, you need to know why wooden trays are better than any other material.
Wooden Trays are Better
When choosing tableware or a tray, you have limited options for materials. These include plastic, ceramic, and melamine. However, these materials are not convenient and have side effects on the environment.
However, we also have other eco-friendly and healthy materials we can use to make a serving tray at home. Out of these few eco-friendly and easy-to-use items, wood is the best material, especially reclaimed wood from Rockin Wood. Here are some of the benefits of considering reclaimed wood when deciding on a material for your serving tray:
1. Durability
Durability is the biggest advantage of using a wooden serving tray. If you live with kids, then broken Tupperware and dishes may be a common occurrence. This can be frustrating, especially if you recently bought new ones. However, wooden trays are a permanent solution to this problem. For quality wooden planks with maximum durability, you can contact Rockin Wood. They can provide the best materials for making a rustic wooden tray at home.
2. No Heat Conduction
Another benefit of using a wooden tray that you will find fascinating is that this material is heat resistant. Items with reclaimed wood construction are less effective at transferring heat from hot utensils. This way, you can keep a hot cup of coffee on the tray without worrying about the bottom getting hot as compared to materials such as plastic and melamine.
3. Easy to Grip Handles
Sometimes, when you hold the grip of a metal tray, you may feel uncomfortable as it has hard edges and can also damage your hands. However, wooden trays are strong but soft and comfortable to hold. This material also fits nicely in your hand when you choose a tray of the perfect size. If you are looking for a comfortable wooden material to make a rustic wood tray at home, you can purchase it from Rockin Wood.
Why Use Reclaimed Wood
Using reclaimed wood is not a new concept. However, people using these materials for remodelling and green buildings are gaining popularity. Previously, these woods were important for constructing new items and furniture. You may have seen this material in old barns or storage crates because of its durability. Homeowners prefer using it as flooring as well. The durability and eco-friendly benefits of this material ensure that you get the most out of your rustic wooden tray. You can purchase these planks from Rockin Wood.
1. Environmentally friendly
When you use reclaimed wood, you decrease the demand for a new tree plank. This saves forests from deforestation. If this material is harvested properly, it can be renewable and will also reduce land waste.
2. Quality and strength
On the Janka scale for hardness, reclaimed wood is 40 points stronger than virgin wood as it usually comes through an old tree rather than first-generation forests.
3. Looks
As this material is weathered and aged, it contains a unique look that you will love. You cannot find this desirable look in any of the new materials. Items and Tools for Making a Rustic Wood Tray You can purchase these tools from any hardware shop. However, most or almost all of these items are available at home. You can also purchase these items on Amazon.
Supplies
- Reclaimed Item (you can purchase heat-resistant reclaimed wood from Rockin Wood as this material does not contain any chemicals)
- Nails (size 30 x 1.6 mm) You can choose bullet nails
- Handles from an old drawer
- Any size of steel brackets
- Black colored small screws
- Can of spray paint (any color that you like, however, black color is preferable)
- Linseed oil or tung oil (boiled)
- Japan wood stain
Tools
- Paintbrush
- Orbital Sander
- Belt Sander
- Vice (These are optional)
Woods Clamps
- Hammer
- Nail gun (If you do not have one, you can also use a hammer)
- A table saw a circular saw, or a mitre saw
Instructions for Making a Rustic Wood Tray at Home
Step 1
If you are using affordable rustic reclaimed wood from Rockin Wood, you need to unwrap the package. The best part of using this material from Rockin Wood is that they are perfect for do-it-yourself constructions. You do not have to remove any pallets, nails, or other unwanted items. However, when using pallet wood, you have to remove the pallet from the wood, which can be tiring and an extra step to go through. Hence, it’s much more convenient to purchase reclaimed wood from Rockin Wood.
Step 2
Now, you need to measure the planks and cut them down into different pieces. As you are making this rustic wooden tray by yourself, you can cut any size according to your usage. This is the benefit of making a wooden tray on your own. If you have no idea about the size and are worried that you may go wrong, you can cut a 45cm x 30cm piece for the inside. This will make the long piece or base 45cm long so that you can easily carry your items. You need to cut the two pieces into 30cm in addition to the thickness of the smaller sides.
Step 3
Now you need to sand the pieces with 80-grit sandpaper. You can first go with an 80-grit belt sander, and after that, you can use an orbital with 240-grit sandpaper. This will give you a desirable surface for your wooden tray.
Step 4
Now when you are nailing, you can use a nail gun to make your job even easier and quicker. However, if you do not have a nail gun at your home, a hammer will do fine. You need to take 30mm x 1.6 mm of nails with a bullet head. You can also use glue to keep the pieces together before hammering the nails inside. However, you need to keep the glued wood pieces overnight to dry, which can be a waste of time. This is where you need to use a vice. A vice will keep the pieces together as you nail them with the hammer.
Step 5
Now you need to take more of Rockin Wood’s reclaimed wood. You will only need two pieces of wood. You need to take a piece of 29.5cm width and cut it in half. After that, you need to sand the piece again and fix it at the bottom of the tray to raise it.
Step 6
Now you need to stain the wooden tray. You can use brown Japan instead of paint. For that, you need to mix it with boiled linseed oil. You can read the instructions on using the mixture from the back of the tin. The instructions will guide you through the ratio of oil to the stain you will use. However, if you use a low ratio of the stain to oil, the solution will be light, and you will have to coat the stain and oil multiple times. In between the coatings, you need to dry them for 24 hours. So if you follow the instructions, you can get the right mixture, saving a lot of time in the process. However, you need to apply at least two coats for the best results.
You can also use raw linseed, but it requires a week to dry and penetrate the wood completely. Boiled linseed includes drying agents so that it dries quickly reduces the stickiness and makes the wood durable. Boiled linseed oil is perfect for indoor items and decor. However, raw linseed is perfect for outdoor items.
Step 7
After applying the sealant and drying it, you need to add some embellishments. Now, you need to spray paint the brackets. Most preferably, the black color will look best. However, you can choose any color you like. After spray painting the bracket, you can let it dry. Once dried, you need to screw the bracket in the corners of the tray to give the pieces some extra support.
Conclusion
By following the above method, you can create a DIY rustic wood tray using reclaimed wood. However, if you are not willing to go through this process and want to buy a readymade rustic wooden tray, you can consider purchasing an Ottoman tray made with reclaimed wood.